
A couple weeks ago we decided to tackle our 'catch all' room aka the office. While Bill was at work I decided to re-arrange and de-clutter to get the process started. The desks started out against the wall to the left and the wall that Bill's degree was hanging on.
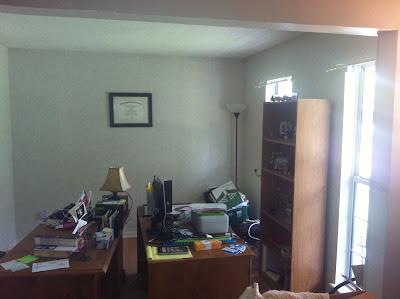

Initially I
had wanted to put them back to back, but both of them weren't flush on
the backside so it was impossible to line them up straight.
So, I text Bill and asked him if he'd be opposed to disposing of one of them.
He had a better idea.
He
decided to break one down and use the scrap wood to build the end
table/dog crate that we had planned to build for Gray-cee and Va.

Just organizing this room made it look and feel so much less chaotic.

We had a few discussions about color, and Bill initially wanted to go with a dark gray, but I found this color (Behr Cardamon Spice) in the 'oops' paint section, and it ended up being a similar - but few shades darker - color to one of the colors in the formal dining, so we decided to go with it.


This table came from the living room... in the space we put the new end table, so we had to find a new home for it. When Bill suggested the office I may or may not have put up some resistance, but once we put it in there and figured out the furniture layout, I'm glad he suggested it.

I refinished it using Behr Cloud Burst and Rustoleum Cocoa Glaze.

We decided to paint the bookshelf and desk white.
Behr Gypsum is what we used on both of pieces of furniture, the wainscoting, and all the trim.

We wanted a few color 'pops' since we painted the walls such a neutral color, so we decided to paint the file cabinet I use for my crafting supplies a wine color.
This was after the first coat and it still looked really pink.

If you follow us on Twitter, Facebook, or Instagram you know that we let Bre help with as much as she could on this renovation, and she absolutely loved every minute of it.

A few weeks ago our aunt sent me a link to a website that she thought I'd like, and let me tell you, there are so many re-purposing projects that I've added to my list after looking through the site.
These no-sew, drop cloth curtains were one of them.

After I cut the drop cloth in half, I used fusible bonding web to make my hems.
Then I taped off the bottom and used brown acrylic paint to make stripes.

Super easy.
And the whole process took less than 2 hrs.
I also used another drop cloth to wrap the back of the bookshelf to give it texture.


After letting the wood acclimate for a few days, it was time to seal the edges of the wainscoting.

Once the wainscoting and chair rail were up, the craft projects started.

I used scrap paper and an old window to make a wedding photo collage.

Photo collage walls are no joke, people.
Lots of measuring and marking, especially when your frames have multiple hooks.

This is a horrible quality picture, but I love this wall.
It includes a 'Count Your Blessings' plaque, one of Bre's baby pictures, a picture of the girls playing in the ocean, our big group family picture from the wedding, a 'P' for Price (not Purdue. lol), a Family plaque, a picture of Bill, Grandma Leola, and I, a picture of Bill and I, a picture of our sand 'unity' candle holder, and the family tree painting my Mother-in-Law painted for our reception.

Bill added molding to the doorway, we added a few pieces of decor/plants, and hung the curtains to finish off our remodel.

We could not be more happy with how our office turned out.
really wonder to look these every steps for office renovation. thanks for this kind of post.
ReplyDeleteinterior design singapore